Translation functionality is the most important part in localization and all applications should have it. OroCRM is not an exception and for this OroCRM team has developed a convenient functionality to work with translations without any difficulties.
If more detailed, OroCRM includes multiple languages and all translatable strings are defined in each bundle – we describe how it works in our article.
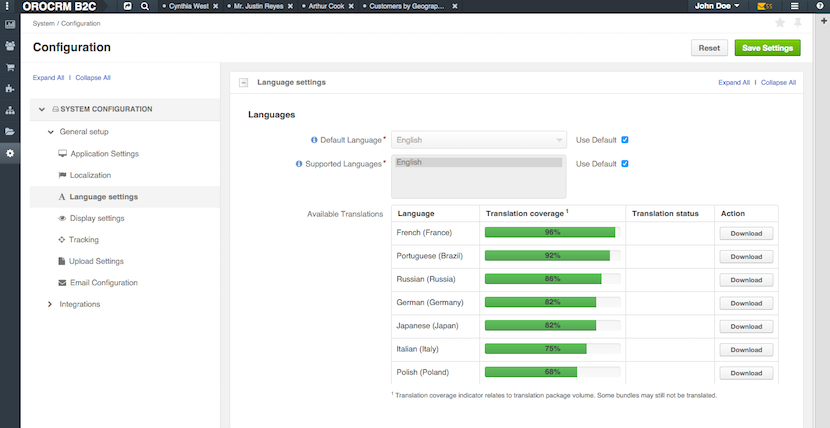
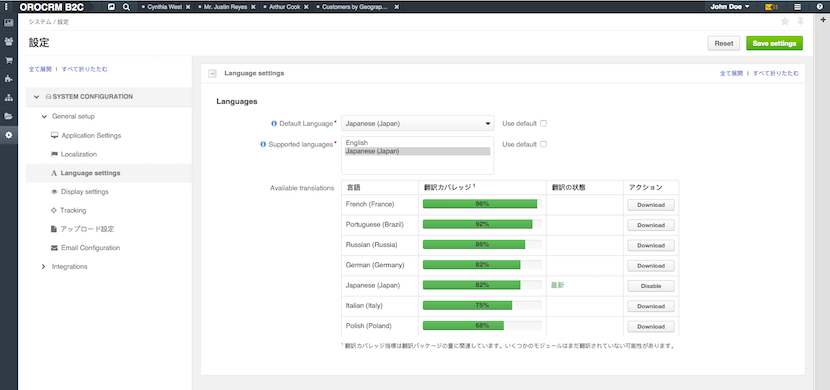
When you want to translate your application in OroCRM just go to System –> Configuration –> Language Settings:
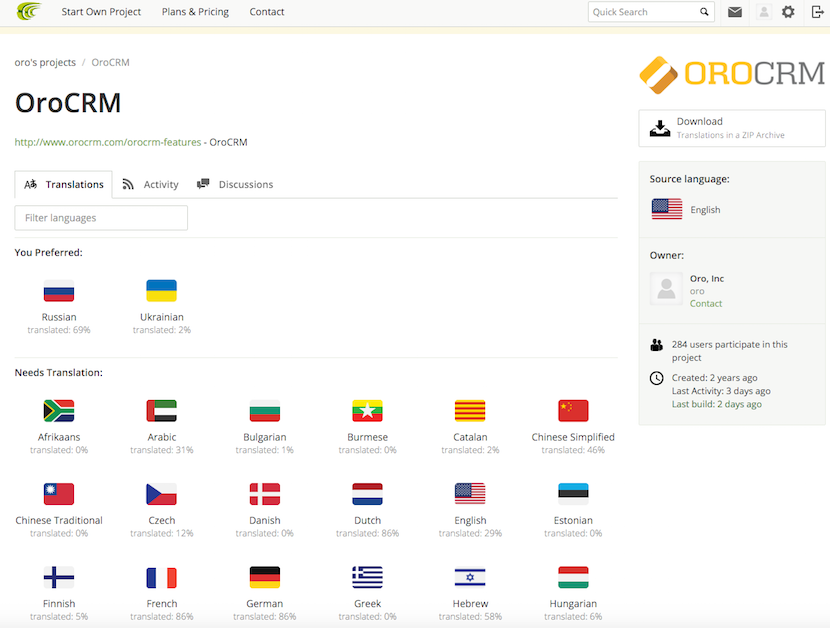
There you will see a list of all available system languages. Some translations are not completed, but OroCRM team continues improving them. And what is more – everybody can take part in improving translations. For that you simply should register in the CrowdIn service and join the OroCRM translation team. This service allows to easily offer your translation and it helps increase the number of supported by OroCRM languages.
We are getting back to our topic and we want to mention that when you are on the Language Settings page and check the available translations, you will see that the default language is English. And to translate our application, we need to choose the corresponding language and download it.
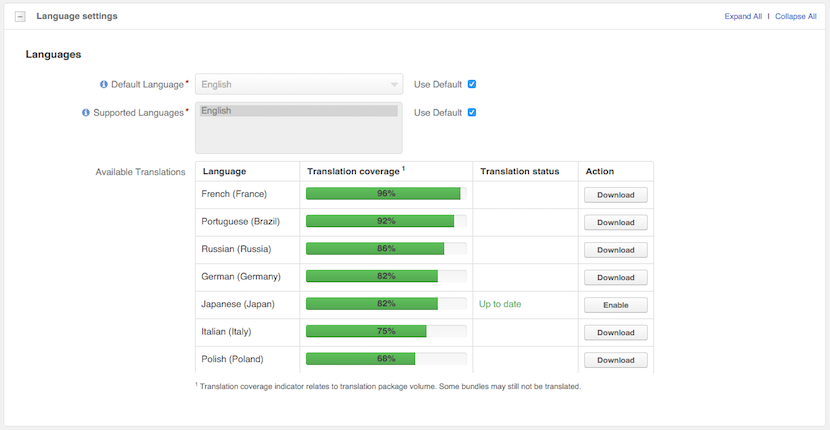
For example, we choose Japanese:
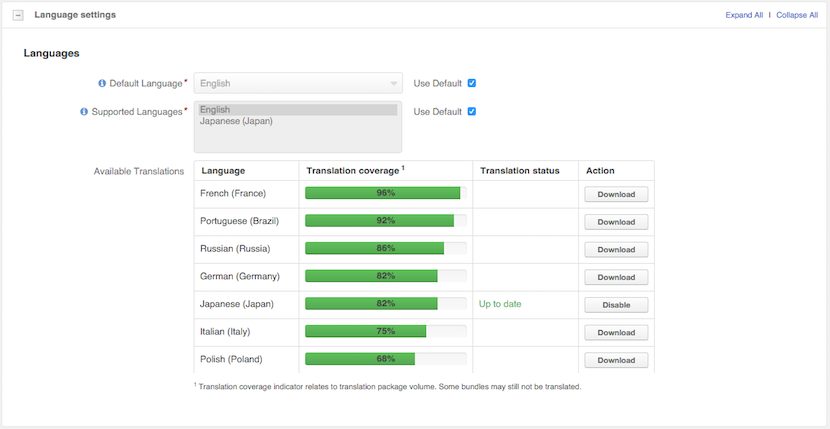
After downloading the language, enable it and refresh the page – as the result, you will see that language in the list of the “Supported Languages”:
As a next step, you should choose the language from the offered list, save the settings and refresh the page again:
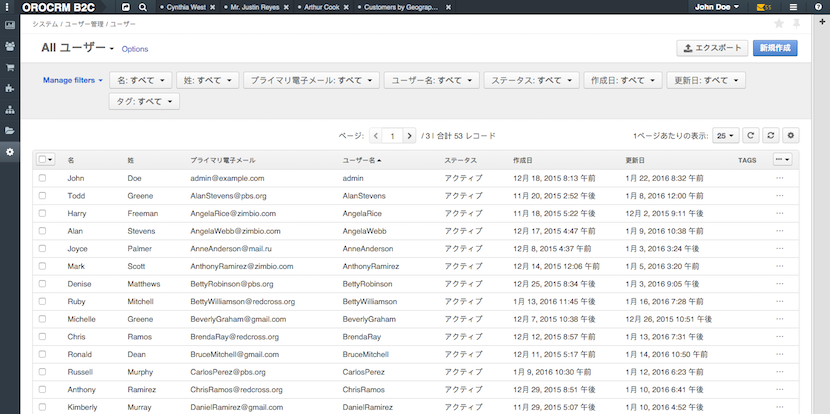
Unfortunately, Japanese is not completed – however, some of the pages are well done and contain all translations, for example Users page:
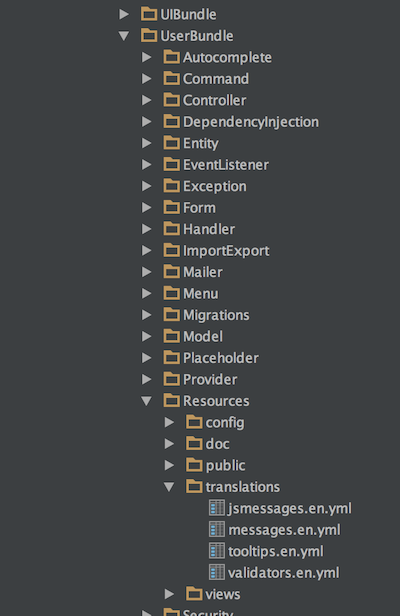
Besides that, if you develop your own bundle and want to have multi language support you do not need to wait when the translation will be added via CrowdIn, you can implement it already inside of the bundle – here we did it for User’s bundle:
The bundle contains translation for different parts:
- messages – common messages that are used for system (messages.en.yml)
- jsmessages – translation that is used on frontend (jsmessages.en.yml)
- validation – it is used to translate form messages (validators.en.yml)
- tooltip – messages for the tooltips form (tooltips.en.yml)
For example, jsmessages.en.yml has the following structure:
oro:
   user:
       update_status.label: Update status
       suggest_password.label: Suggest password
       show_hide_password.label: Show/hide password
       reset_password:
           flash:
               success: Reset password email has been sent to user
       change_password:
           flash:
               success: The password has been changed
The files have strict format:
<application>:
    <bundle>:
        <section>:<key>


oro:         #application
   user:           #bundle
       update_status.label: Update status           #section:key
       suggest_password.label: Suggest password
After writing your translation you can call it from the code. For backend part we use translation that is described in messages.yml – “translation suggest_password.label: Suggest password”:
$this->get('translator')->trans('suggest_password.label');
in Twig template:
{{‘suggest_password.label’ l trans}}
Also, you can translate using parameter: “translation suggest_password.label: Suggest password for user %id%”:
$this->get('translator')->trans('suggest_password.label', [‘%id%’ => 23]);
in Twig template:
{{‘suggest_password.label’ l trans({‘%id%’ : 23’})}}
Furthermore, for frontend part we use translation that is described in jsmessages.yml – “translation suggest_password.label: Suggest password for user %id%”:
require(['orotranslation/js/translator'],
function(__) {
     __(‘suggest_password.label’ ,{‘%id%’ : 23’);
});
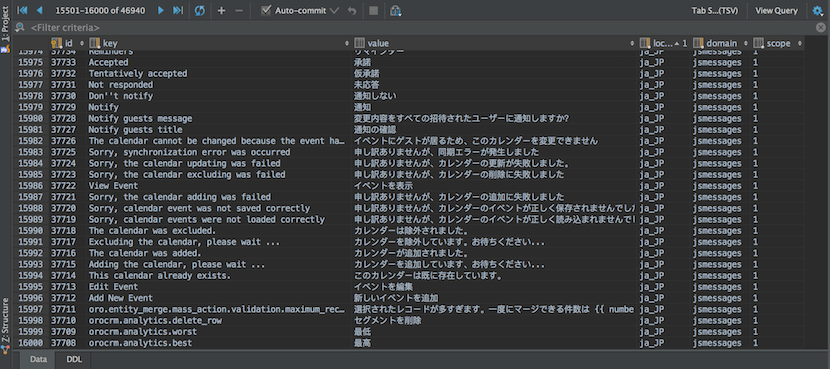
Pay attention that the translation files are not only the one place where we can find the translations. They can be also described in the database. If more detailed, all the translations that were downloaded from CrowdIn are placed in the database – table oro_translation.
As you can see, OroCRM developed the translation system quite well. So, you do not need much effort to translate your bundle or change the language for application – just download the language you need or add few lines to your code.

