Have you ever edited a CMS page? Perhaps you’ve inserted a custom image or just added a link to another page of your store. What did you do for that? We assume that you simply copy-pasted the link from your browser and inserted it to the CMS page directly. Then, you have edited one more CMS page or block in the same way. It looks like a good solution. However, imagine that one day you will need a solution for changing, let’s say, a domain name of your store. You will need to fix the old domain name in each of the edited CMS pages and blocks to prevent redirect to it. This is not good approach and, to improve that process, we should use directives.
Directive is a special shortcode or placeholder that can be replaced by some actual information. This term isn’t new for Magento users, because it came from Magento 1.x and it has the same usage in Magento 2.
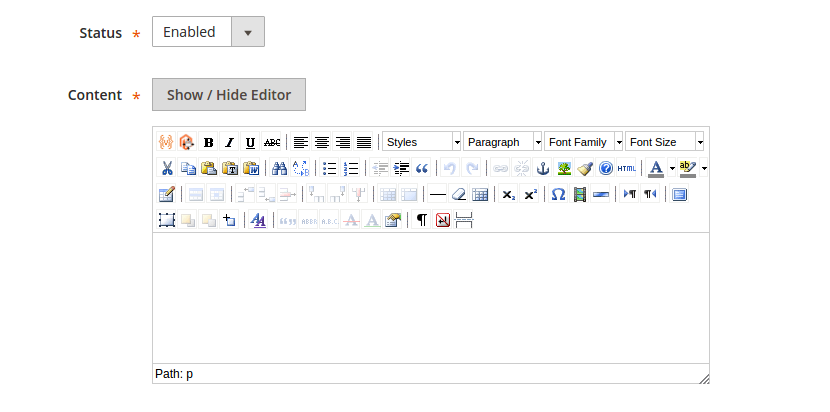
The directives can be used everywhere if the WYSIWYG editor is present or for email templates usage. Moreover, it can be a kind of custom behaviour that is based on a default template filter:
Magento 2 WYSIWYG editor
Here is a list with the directives that can be used in Magento 2:
- CMS pages and CMS blocks edit form
- Email and newsletter templates edit form
- Products and categories edit form
And the default directives are:
- Media Directive – it helps set URL to a file that is located in Magento media directory.
Usage: we can set a path of the file related to Magento media directory via “url” parameter:
{{media url="/path/to/some/image.jpg"}}
In the example above, the media directives will be replaced by:
http://magento2.dev/pub/media//path/to/some/image.jpg
- Store Directive – it helps get URLs of your stores.
Usage: we can use empty “url” parameter to get URL of a store:
{{store url=""}}
We can also get some URL by this specific route:
{{store url="admin/auth/resetpassword/"}}
It works for URL of image.jpg file: http://magento2.dev/path/to/some/image.jpg
{{store direct_url="/path/to/some/image.jpg"}}
URL with specific GET parameters:
{{store url="admin/auth/resetpassword/" _query_id="1" _query_company="atwix"}}
- Translate Directive – it helps localize some strings.
Usage: it’s an example of using the localization ability:
{{trans "string to translate"}}
Note that the string that should be translated will be escaped by default. That’s why we can’t use html tags inside of the string, for example. To be able to do this, we should specify a raw modifier like on the following instance:
{{trans "<em>Important message</em>"|raw}}
You can use a variable in the localized string. It makes localization more flexible:
{{trans "string to %var" var="$variable"}}
Here is a variable for replacement (we can use any variables that have been assigned in a template that contains the translation directive). Take a look at the following example:
{{trans "Hi %customer_name" customer_name=$order.getCustomerName()}}
As you can see, we ask getCustomerName() method of $order object that was assigned in the current template to replace the “%customer_name” placeholder with an actual customer name.
- View Directive – it retrieves the URL of view.
{{view url='Magento_Customer/images/icn_checkout.png'}}
As follows, here we will get URL of the file that has been saved under the “Magento_Customer/images/icn_checkout.png” directory of the current theme.
- Layout Directive – it applies layout updates from a special handle and special area.
{{layout handle="sales_email_order_creditmemo_items"}}
Apply layout updates with the “sales_email_order_creditmemo_items” handle to the current template. If area isn’t specified – Magento uses a handle from the frontend area:
{{layout handle="sales_email_order_items" order=$order area="frontend"}}
Then, apply layout update with the “sales_email_order_items” handle from the frontend area. The order parameter will be assigned to the data array of all of the blocks that will be generated by layout update. In this way, we can assign any information to the blocks. Below we describe the block directive.
- Block Directive – it retrieves HTML of some blocks.
{{block class='Atwix\ImageSlider\Block\Slider'}}
For example, let’s try to create a new block with the type: Atwix\ImageSlider\Block\Slider:
{{block class='Magento\\Framework\\View\\Element\\Template' template='Magento_Sales::path/to/template.phtml'}}
Or create a new Magento\Framework\View\Element\Template block that will render path/to/template.phtml from Magento_Sales module:
{{block class='Magento\\Framework\\View\\Element\\Template' area='frontend' template='Magento_Sales::email/shipment/track.phtml' shipment=$shipment order=$order}}
You can also create a block by class Magento\Framework\View\Element\Template – it will render the “Magento_Sales::email/shipment/track.phtml” template (it contains information about the current shipment and the current order in the data array):
{{block id="women-block" }}
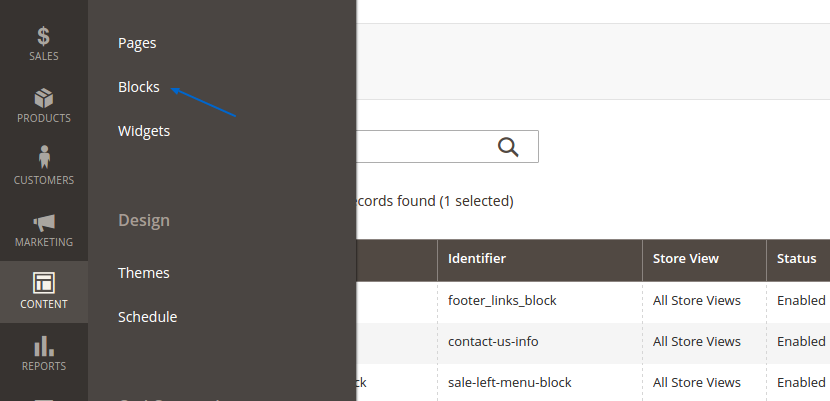
Here we create a CMS block with “women-block” identifier. And the list of the available CMS blocks you can find on the Content->Blocks page:

For more examples, we create a new block with type: Atwix/Custom/Block/Render and use toHtmlCustom() method to render this block:
{{block class="Atwix/Custom/Block/Render" output="toHtmlCustom" }}
- Inline CSS Directive – it sets a file to be applied as inline CSS.
This directive is processed by a top-level template and that gives an ability to apply included CSS to the whole HTML page. Actually, the HTML and CSS files should be merged. As the result, HTML page will contain the applied styles “inline” (in the style attribute of HTML tag). This is necessary for email templates in order to support all email clients that will render them. Load the file from the theme directory:
{{inlinecss file="css/filename.css"}}
Or load the file from the module directory or module directory in theme:
{{inlinecss file="Magento_Sales::css/filename.css"}}
- CSS Directive – it loads and returns the content of CSS file.
Load this file from the theme directory:
{{css file="css/filename.css"}}
Or from module directory or module directory in theme:
{{css file="Magento_Sales::css/filename.css"}}
- Custom Variable Directive – it retrieves a custom variable for the current store by variable code:
{{customvar code="variable_code"}}
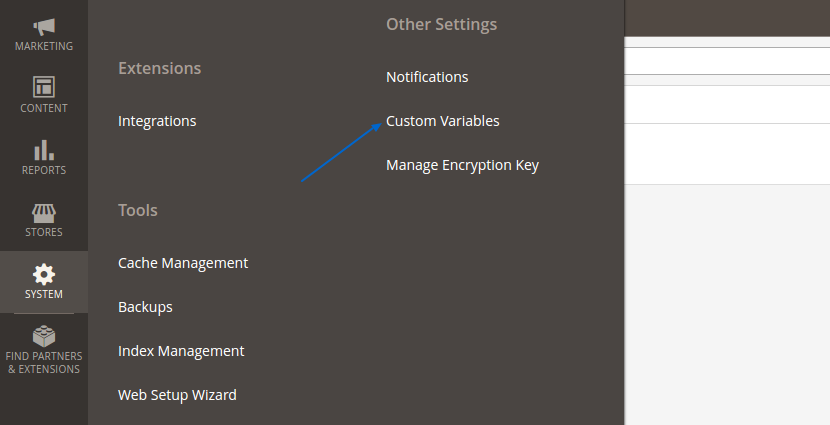
The detailed list of the custom variables we can find on the “System”->”Custom Variables” page:
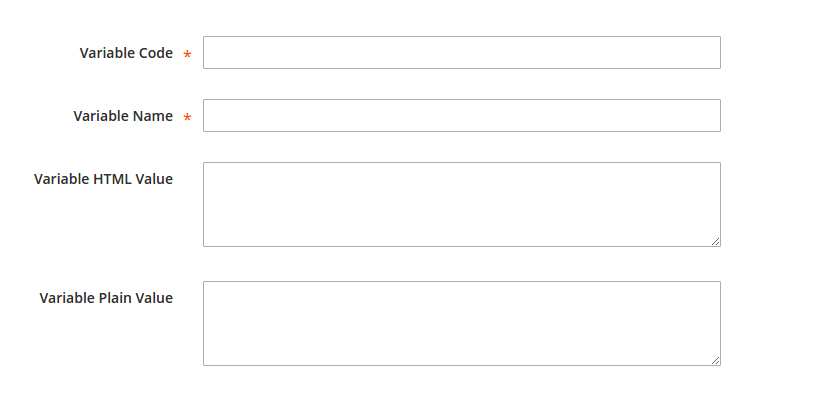
Moreover, there is a button that helps add a new custom variable. Take a look at the custom variable edit form:
If more detailed, a variable code is used for the variable identification.
- Config Directive – it retrieves a value that has been saved in a specific config by its xpath:
{{config path="web/unsecure/base_url"}}
- Protocol Directive – it retrieves HTTP protocol.
For example, retrieve HTTP protocol of the current store (HTTP or HTTPS):
{{protocol}}
Or retrieve URL started with protocol of the current store:
{{protocol url="www.store-domain.com/"}}
Or if one of URLs depends on the protocol of the current store:
{{protocol http="http://url" https="https://url"}}
We can get a protocol of some store with this store ID, just use the optional parameter “store” for this purpose:
{{protocol store="1"}}
- Var Directive – it helps use variables that have been assigned to a template.
This variable can be just a scalar value:
{{var log_url}}
We can get data from an instance of \Magento\Framework\DataObject object:
{{var customer.name}}
Also, we can invoke methods of a class:
{{var subscriber.getUnsubscriptionLink()}}
- Template Directive – it helps include a template inside of another template. It can be useful for such templates as header or footer.
Try to include one more template which value should be stored in the system configuration with xpath (that is specified in the “config_path” attribute):
{{template config_path="design/email/header_template"}}
We have described where you can find templates in Magento 2 and how to work with directories. We hope that it will simplify your work with Magento 2. Feel free to share your feedback with us in the comments below.
Read more:


