Many testing tools are overly complicated. For a while, we searched for an automated testing framework that would meet our needs. We tried a lot of frameworks like Selenide and CasperJS but they were not exactly what we’ve been looking for. Not so long ago, we’ve discovered a tool Codeception and I want to introduce you to it.
Codeception is a powerful but at the same time, a very simple tool that covers your projects with auto-tests. It was created based on a famous testing framework – PHPUnit.
There are three types of tests: Acceptance tests, Functional tests, and Unit tests.
In this blog post I will cover acceptance tests, which can help you emulate a customer behavior on your web store and check different scenarios in order to make sure that the website works properly.
How to install
There are few installation ways. You can install it using composer, git or just download a phar file.
I will install Codeception globally.
sudo curl -LsS http://codeception.com/codecept.phar -o /usr/local/bin/codecept
sudo chmod a+x /usr/local/bin/codecept
Now, you can verify if Codeception is installed.
codecept --version
Well, installation was successful and we can start creating a testing environment.
Creating a project
To create your Codeception project just run a command in terminal:
cd path/to/project
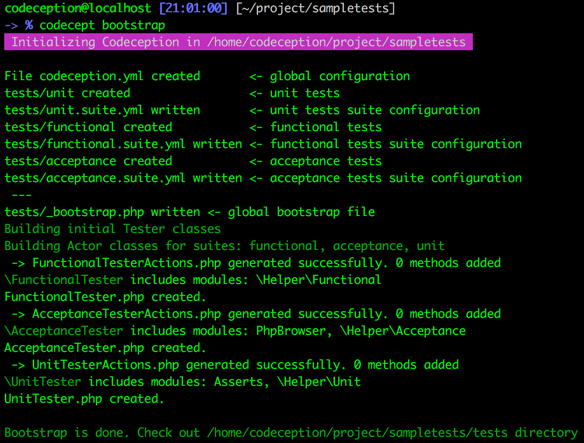
codecept bootstrap
You will be able to see that the file structure was generated successfully.

General configurations
Installing a WebDriver
In order to run our tests we need a WebDriver. You can use Selenium to run your tests on Chrome, Firefox, Safari, or IE. I use a headless browser that includes a WebDriver – PhantomJS. PhantomJS is a ‘Ghost Driver’ and you can run tests on a Linux server and CI system such as Jenkins or TeamCity.
PhantomJS installation
PhantomJS is easy to install. Download and unpack PhantomJS. Once downloaded, move PhantomJS folder to “/usr/local/share/” and create a symlink.
Example for Linux:
sudo mv phantomjs-2.1.1-linux-x86_64/ /usr/local/share
sudo ln -sf /usr/local/share/phantomjs-2.1.1-linux-x86_64/bin/phantomjs /usr/local/bin
Now PhantomJS should be installed in your system.
phantomjs --version
To start PhantomJS WebDriver, just run a command in a separate terminal tab.
phantomjs --webdriver=4444 --ssl-protocol=any --ignore-ssl-errors=true
To finish configuration successfully, and to create our first acceptance test we should add a base URL and WebDriver into the configuration file “tests/acceptance.suite.yml”
# Codeception Test Suite Configuration
#
# Suite for acceptance tests.
# Perform tests in browser using the WebDriver or PhpBrowser.
# If you need both WebDriver and PHPBrowser tests - create a separate suite.
class_name: AcceptanceTester
modules:
    enabled:
        - WebDriver:
        - \Helper\Acceptance
    config:
        WebDriver:
            url: 'http://bravo.atwix.com:1000/mage21/'
            browser: phantomjs
            window_size: 1920x1310
            capabilities:
              webStorageEnabled: true
Where
- url: the base URL of the local website.
- browser: a browser, which will be used to run tests in. You can also use Selenium WebDriver to launch your tests on Firefox, Google Chrome, etc.
- window_size: a screen resolution.
Now the local environment and Codeception should be ready for use.
Acceptance Testing
Acceptance testing gives us an opportunity to test a website functionality as a customer using a browser. You can view pages and check elements there, fill and submit forms. Well, you can emulate any customer behavior.
To check your website’s main functionality fast, you can create a scenario and cover it by acceptance tests. After Magento upgrade or implementing a new feature, you can launch all tests and check whether they pass a test.
I created few examples of tests for Magento 2.1.2 with sample data to show you how it works. Let’s write our first test.
Homepage test
To generate an acceptance test you should run a command in the folder with the test project.
codecept generate:cept acceptance HomePage
You will be able to see, that a new test was created in your project folder with a name “tests/acceptance/HomePageCept”.
![]()
Now, you can add code for Homepage test into “tests/acceptance/HomePageCept.php”.
I created simple tests that check Homepage in clean Magento 2.1.2 with sample data. The test should check:
- Open homepage
- Check if logo is present
- Header panel
- Check and fill search input field
- Navigation menu and element in navigation menu
- Page content
- Footer
- Newsletter subscribtion
 <?php
$I = new AcceptanceTester($scenario);
$I->am('Customer');
$I->wantTo('Open home page');
$I->amOnPage('/');
$I->wantTo('See logo');
$I->waitForElement('header.page-header strong.logo'); // #1 - logo
$I->seeElement('header.page-header strong.logo img');

$I->seeElement('header.page-header div.panel.header'); // #2 - header panel
$I->see('Sign In', 'header.page-header div.panel.header li.authorization-link a');

$I->seeElement('#search'); // #3 - search input
$I->fillField('#search', 'Atwix test');
$I->seeInField('#search', 'Atwix test');

$I->seeElement('#store.menu'); // #4 - Navigation menu
$I->cantSeeElement('a#ui-id-27'); // #5 - Element in navigation menu
$I->moveMouseOver('#ui-id-6');
$I->waitForElementVisible('a#ui-id-27');
$I->canSeeElement('a#ui-id-27');

$I->seeElement('div.block-promo-wrapper');

$I->seeElement('div.block.widget.block-products-list.grid');

$I->seeElement('footer.page-footer'); // #6 Footer
$I->see('Copyright © 2016 Magento. All rights reserved.', 'small.copyright');

$I->fillField('#newsletter', 'leandry@atwix.com'); // #7 Newsletter
$I->click('form#newsletter-validate-detail button.action.subscribe.primary');
$I->waitForElementVisible('#maincontent div.messages div.message-success');
$I->see('Thank you for your subscription.', '#maincontent div.messages div.message-success');
To launch your test, you need to run a command in a Codeception project.
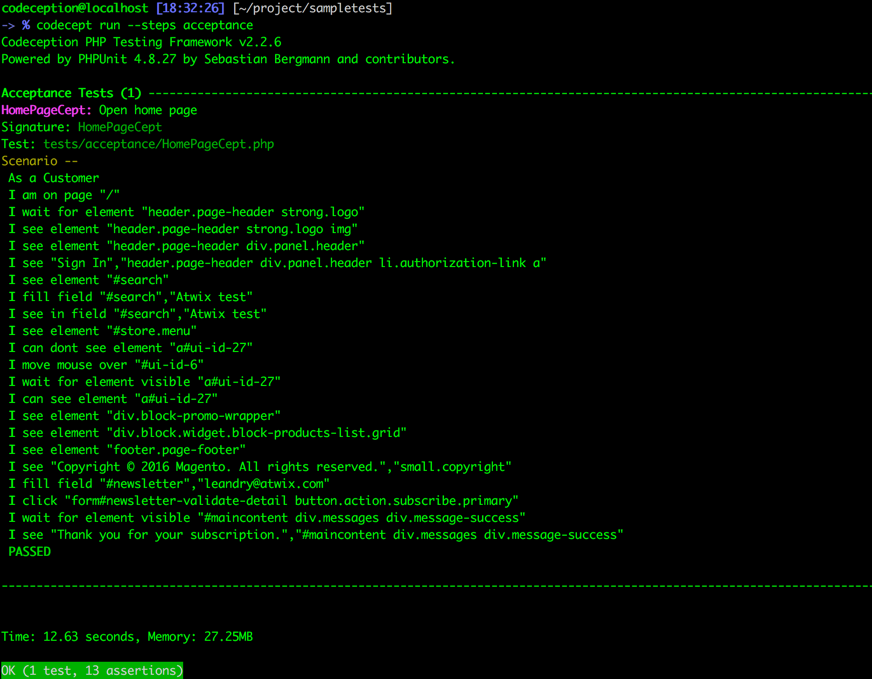
codecept run --steps acceptance
Here is what I’ve got after running a “Homepage” test.

Please note, that if you run this test again, you will get an error because our customer with an e-mail “leandry@atwix.com” was already registered. So, you should remove subscription and run it again to see a positive result. You can manually remove a customer subscription from admin panel or using an AcceptanceHelper extension created by Yaroslav Rogoza. You can remove a customer and a subscriber, create and remove a test product, flush cache storage using this extension.
This extension should not be used on production environment since it uses controllers accessible by direct URLs without authentication.
Magento 1 AcceptanceHelper – https://github.com/rogyar/magento1-acceptance-helper
Magento 2 AcceptanceHelper – https://github.com/rogyar/magento2-acceptance-helper
Also, if you get errors while running tests, you can find screenshots and page HTML in the “tests/_output/” folder, and check what has happened.

Add product to cart test
If you need to create a test to check a simple scenario, you can use Cept tests format. But, If you want to group few testing scenarios into one, you should consider using Cest format. Cest combines a scenario-driven test approach with OOP design.
Let’s generate a Cest test for the “add product to cart” scenario.
codecept generate:cest acceptance AddProductToCart
You will see a new generated test “AddProductToCartCest.php”.
![]()
To make tests cleaner and more readable. Let’s move all CSS or XPath locators in our test into PageObject class. It is very important for creating a flexible architecture of your tests.
You can generate it with a command:
codecept generate:pageobject Product
You will be able to see that PageObject was created “tests/_support/Page/Product.php”
Let’s add all of CSS or XPath locators and string values into the generated file “tests/_support/Page/Product.php”
<?php
namespace Page;

class Product
{
    // include url of current page
    public static $simpleURL = '/aim-analog-watch.html';
    public static $configurableURL = '/deirdre-relaxed-fit-capri.html';
    public static $shoppingCartURL = '/checkout/cart/';

    public static $pageLogo = 'header.page-header strong.logo';
    public static $successMsg = 'div.message-success';
    public static $qtyCounter = 'span.counter.qty';
    public static $numberCounter = 'span.counter-number';

    public static $pageTitle = 'h1.page-title';
    public static $productName = 'Aim Analog Watch';
    public static $breadcrumbs = 'div.breadcrumbs';
    public static $simplePrice = '#product-price-36';
    public static $inStock = 'div.stock.available';
    public static $qty = '#qty';
    public static $addCartBtn = '#product-addtocart-button';

    public static $configProductName = 'Deirdre Relaxed-Fit Capri';
    public static $configOptions = '#product-options-wrapper';
    public static $colorOption = '//*[@id="product-options-wrapper"]/div/div/div[1]/div/div[1]'; //blue
    public static $colorOptionName = 'Blue';
    public static $colorOptionSelected = 'div.swatch-attribute.color span.swatch-attribute-selected-option';
    public static $sizeOption = '//*[@id="product-options-wrapper"]/div/div/div[2]/div/div[2]';
    public static $sizeOptionName = '29';
    public static $sizeOptionSelected = 'div.swatch-attribute.size  span.swatch-attribute-selected-option';

    public static $cartItem = 'tbody.cart.item';
    public static $cartQtyFirstItem = '//*[@id="shopping-cart-table"]/tbody/tr[1]/td[3]/div/div/input';
    public static $cartProductOption = '#shopping-cart-table  tbody.cart.ite,  tr.item-info  td.col.item   dl.item-options dd';
}
In the “AddProductToCartCest” test, we will check Adding simple and configurable products to the cart.
<?php
use \AcceptanceTester as AT;
use Page\Product as Product;

class AddProductToCartCest
{
    public function _before(AT $I)
    {
    }

    public function _after(AT $I)
    {
    }

    public function openHomepage(AT $I)
    {
        $I->am('Customer');
        $I->wantTo('See Home Page');

        $I->amGoingTo('Open Home page');
        $I->amOnPage('/');
        $I->waitForElement(Product::$pageLogo);
        $I->seeElement(Product::$pageLogo.' img');
    }
    public function addSimple(AT $I)
    {
        $I->wantTo('Add simple product to the cart');
        $I->amOnPage(Product::$simpleURL);
        $I->waitForElement(Product::$pageTitle); // wait and check product name
        $I->see(Product::$productName, Product::$pageTitle);

        $I->seeElement(Product::$breadcrumbs);
        $I->seeElement(Product::$simplePrice);
        $I->see('In stock', Product::$inStock);

        $I->seeElement(Product::$qty);
        $I->fillField(Product::$qty, 2); // change qty to 2

        $I->click(Product::$addCartBtn);//click on "add to cart" button

        $I->waitForElement(Product::$successMsg);
        $I->see('You added '.Product::$productName.' to your shopping cart.', Product::$successMsg);
        $I->waitForElementVisible(Product::$qtyCounter);
        $I->see(2, Product::$numberCounter);

        $I->wantTo('Open and check Shopping cart');
        $I->amOnPage(Product::$shoppingCartURL);
        $I->seeInCurrentUrl(Product::$shoppingCartURL);
        $I->waitForElement(Product::$pageTitle);
        $I->see('Shopping cart', Product::$pageTitle);

        $I->seeElement(Product::$cartItem);
        $I->seeInField(Product::$cartQtyFirstItem, 2);//check if qty = 2 for the first element in tbody

    }
    public function addConfigProduct(AT $I){
        $I->wantTo('Add Configurable product to the cart');
        $I->amOnPage(Product::$configurableURL);
        $I->waitForElement(Product::$pageTitle);
        $I->see(Product::$configProductName, Product::$pageTitle);

        $I->seeElement(Product::$breadcrumbs);
        $I->seeElement(Product::$configOptions);


        $I->click(Product::$colorOption);
        $I->click(Product::$sizeOption);
        $I->see(Product::$colorOptionName, Product::$colorOptionSelected);
        $I->see(Product::$sizeOptionName, Product::$sizeOptionSelected);
        $I->see('In stock',Product::$inStock);

        $I->click(Product::$addCartBtn);

        $I->waitForElement(Product::$successMsg);
        $I->see('You added '.Product::$configProductName.' to your shopping cart.', Product::$successMsg);
        $I->waitForElementVisible(Product::$qtyCounter);
        $I->see(1, Product::$numberCounter);


        $I->wantTo('Open and check Shopping cart');
        $I->amOnPage(Product::$shoppingCartURL);
        $I->seeInCurrentUrl(Product::$shoppingCartURL);
        $I->waitForElement(Product::$pageTitle);
        $I->see('Shopping cart', Product::$pageTitle);

        $I->seeElement(Product::$cartQtyFirstItem);
        $I->see(Product::$colorOptionName, Product::$cartProductOption);
        $I->see(Product::$sizeOptionName, Product::$cartProductOption);
    }
}
To start the test, we need to run a command:
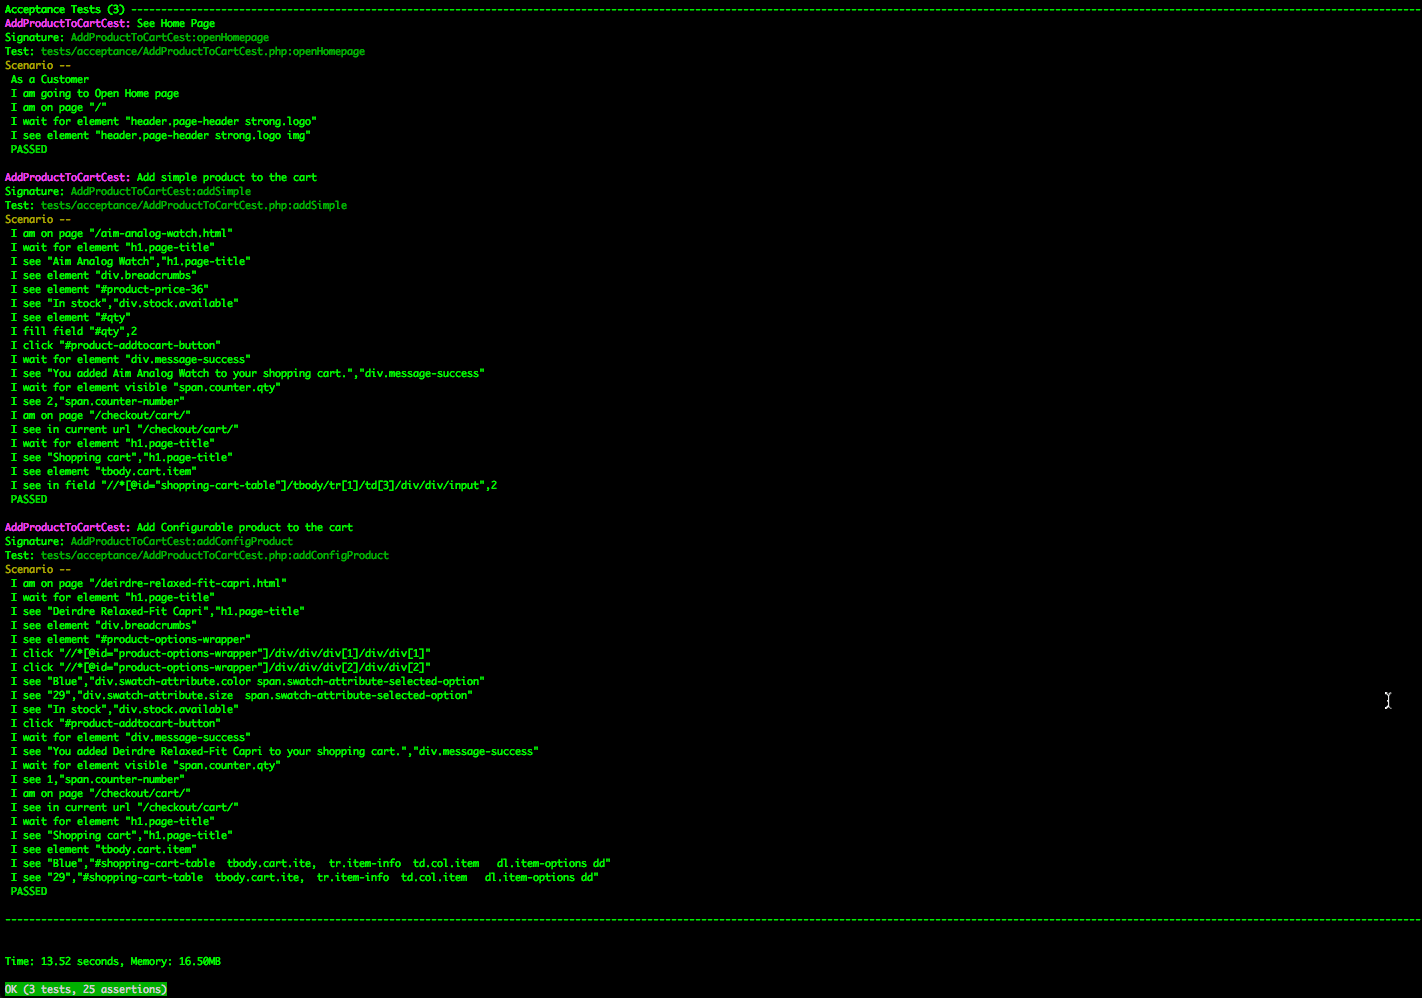
codecept run --steps acceptance AddProductToCartCest
And here is what we get.

So, we have covered a homepage, simple and configurable product pages, with simple tests that check the main functionality of these pages. In addition, you can find all the tests on GitHub.
Conclusion
Codeception is an amazing testing framework, that gives you an ability to write readable tests and make testing easy. It is flexible enough to create a strong test automation platform. These test examples were created in order to introduce you to the framework. You can find more information and examples in the official documentation.
Also, to make the tests clean, stable and comfortable in service, you should avoid hard-coded values in your tests, so you can make the tests more resistant to changes.
Happy Testing!
