We’ve prepared step by step guide about how to install OroCRM on Maс. We are highlighting problems that you may face with during an installation process.
First of all, choose OroCRM installation directory and navigate to it. Start with downloading these files:
git clone https://github.com/orocrm/crm-application.git
You should see composer.json file in the root directory. As you may already know, the Composer is a very powerful tool that will install all required packages for OroCRM application. Installing Composer is a very easy task, and here are a few commands that will do it for Mac OS:
cd /usr/local/bin
curl -sS https://getcomposer.org/installer | php
mv composer.phar composer
Now, just come back to the installation directory and run the following command to install required dependencies and even configure OroCRM installer:
composer install
Unfortunately, here are the first problems that we have faced with:  So, let’s try to resolve them. As the Composer’s output says – we need to install PHP Intl extension. Homebrew will help us with the set up:
xcode-select --install # make sure you have Xcode command line tools installed
ruby -e "$(curl -fsSL https://raw.github.com/mxcl/homebrew/go/install)" # to install homebrew
brew install autoconf # to install autoconf
Below is a complete list of commands that will bring us to the installed PHP Intl:
brew install icu4c # command will return ICU libraries path, use it when you will be asked executing next command
sudo pecl install intl
Then, add extension=intl.so to php.ini and restart the web server. So, now we can run composer install again. After several minutes of downloading you will be prompted to enter the parameters (database connection, etc) that will be recorded to parameters.yml file and then used for installation.
It is time to set up a virtualhost. Pay attention that virtuahost DocumentRoot/Directory should refer to web folder of our OroCRM installation catalog. Here is how the configuration for Apache looks in our case:
<VirtualHost *:80>
	ServerName "dev.orocrm.com"
	DocumentRoot "/Users/admin/repos/orocrm/web"
	<Directory "/Users/admin/repos/orocrm/web/">
		Allow From All
		AllowOverride All
	</Directory>
	DirectoryIndex index.php index.html app.php
</VirtualHost>
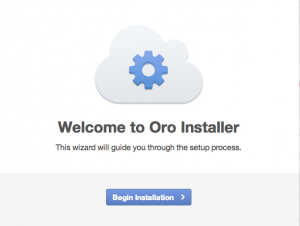
Now, we are ready to start OroCRM installation. For this we can use WEB interface or command line installer. So, let’s try the browser way.
If you navigate to virtualhost’s address, there you will see a blank page instead of the installer, it means that something is wrong. Checking Apache logs we’ve found the wrong permissions. Later check this page for setting up permissions, but for now the following in enough:
chmod -R 777 app/cache/
chmod -R 777 app/logs/
Even after refreshing the page nothing happened again. It is certain that now we need to adjust PHP configuration.
Edit php.ini and make sure that the following is set:
- – Increase memory_limit – at least 256M
- – Increase max_execution_time – at least 300 (restore previous value after installation finished)
- – Set date.timezone
- – Disable detect_unicode
- – Disable xdebug.scream
- – Disable xdebug.show_exception_trace
- – Set xdebug.max_nesting_level above 150
After applying these settings we are happy to see the web installer popup.
However, most likely you will see that some of the requirements have not met yet. It is permissions and mcrypt. Let’s set the permissions first:
chmod 777 web web/bundles web/uploads app/config/parameters.yml
Installing mcrypt extension will take more steps:
- – Download libmcrypt
- – Download PHP source code that matches your version
- – extract everything to the some directory: ~/Desktop/source
- – Install libmcrypt using commands:
cd ~/Desktop/source/libmcrypt-2.5.8/
MACOSX_DEPLOYMENT_TARGET=10.9 CFLAGS='-O3 -fno-common -arch i386 -arch x86_64' LDFLAGS='-O3 -arch i386 -arch x86_64' CXXFLAGS='-O3 -fno-common -arch i386 -arch x86_64' ./configure --disable-dependency-tracking
make -j6
sudo make install
-
- – Use the following to install mcrypt PHP extension:
cd ~/Desktop/source/php-5.4.24/ext/mcrypt/
phpize
MACOSX_DEPLOYMENT_TARGET=10.9 CFLAGS='-O3 -fno-common -arch i386 -arch x86_64' LDFLAGS='-O3 -arch i386 -arch x86_64' CXXFLAGS='-O3 -fno-common -arch i386 -arch x86_64' ./configure --with-php-config=/usr/bin/php-config
make -j6
sudo make install
– Add extension=mcrypt.so to your php.ini and restart Apache
After that, check your OroCRM installer page again, and as a result, you should have all requirements satisfied now. By the way, there are two optional requirements such as PHP accelerator and NodeJS.
Let’s install APC (Alternative PHP Cache). For this purpose, first of all, we need to install PCRE libraries, download them from here. Then, extract archive and run the following commands:
./configure
make
sudo make install
Now, APC can be installed using pecl:
sudo pecl install apc
Then, just add extension=apc.so to php.ini, refresh the page and you will be able to click “next” button to proceed with the installation.

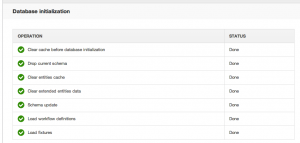
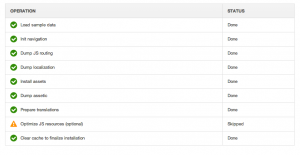
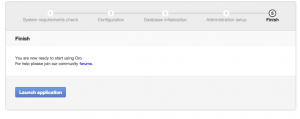
Furthermore, wait for database initialization is finished and fill in the administration settings on the next step. Then, click on “install” button to finish the installation.

There is no doubt that you will get OroCRM installed.

We hope this article will help you to start developing with OroCRM. Thanks for reading our post.

